Sidebar
Create and Send Auto-responder
This article explains how to create and send auto-responder.
Create Auto-responder
Attach List—Priority: List Type and Subscription
Auto-responders are a great way to automatically reach and engage your subscribers, without having to physically sit down and write to each and every one of them.
Here are a few ways you can use autoresponders:
- Automatically send a follow up email to customers who have purchased from you using jMarket/jStore.
- Create and send an email course to your subscribers. You can schedule the course to be emailed over different days. For example, you could send your subscriber a new email every Monday, or even a new email every day.
This functionality is only available in the paid versions.
You need to create an Auto-responder List first before you start to create your Auto-responder Newsletter.
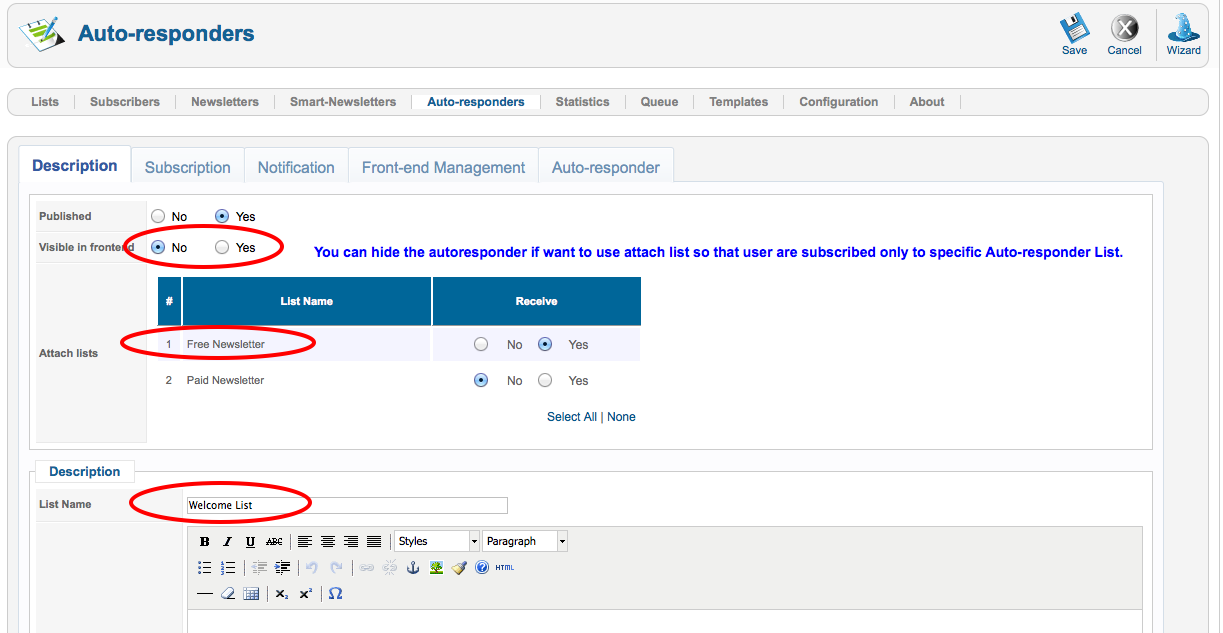
Step—1 Create an Auto-responder List
In the admin panel, Components >> jNews >> Auto-responder
Click New to create a List.
Fill out the setup details with the your information and configurations.
Select a list in the Attach List if you want the user subscribes to a list where auto-responder is attached and the user will also be subscribed to the auto-responder automatically.
To understand this idea better, let’s follow with an example.
Susan is a financial coach who sell courses.
She has 2 list, Free newsletter List and Paid newsletter list.
She also has 2 Auto-responder list, Welcome List and Course List
Susan wants to subscribe every user who subscribes to Free newsletter are automatically added to the Welcome list in her auto-responder to entice the them to purchase her products.
While the paid newsletter user are added automatically to the Course List and receives daily emails.
To be able to achieve above scenario Susan needs to Create an Auto-responder List with an Attach List.
Please check below topic to learn more about Attach list.
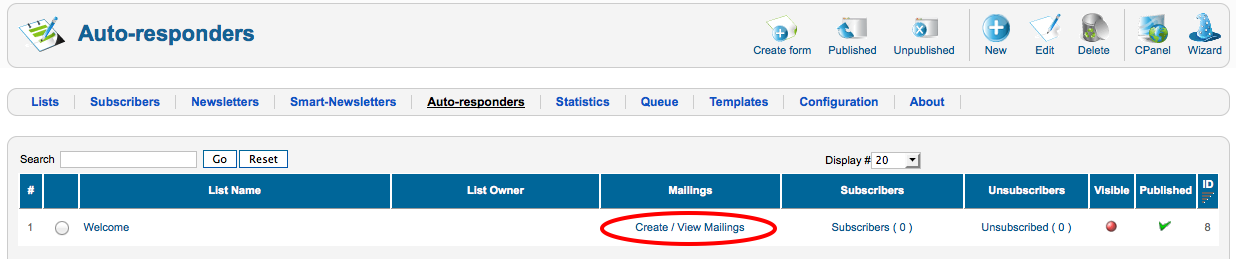
Step—2 Create your Auto-responder newsletter
In the Auto-responder List page, click Create / View Mailings.
Click on the button New to create a new Newsletter
The default template is automatically loaded—you can create your personal customize template or change the default one in the template section.
Ste-3 Select your template
Click on the Template button and select any other template available by default. It has 6 default templates you can use for free.
Write a subject and the content of your e-mail the way you want. You can insert pictures, text, links and so on..
Step—4 Add tags to your Newsletter
In the Newsletter edit page, click on the TAG button.
Tag is used to insert information like subscriber information, Joomla and K2 articles, modules, JomSocial data and social tags to promote your newsletter to a bigger audience like Facebook, Twitter and LinkedIn.
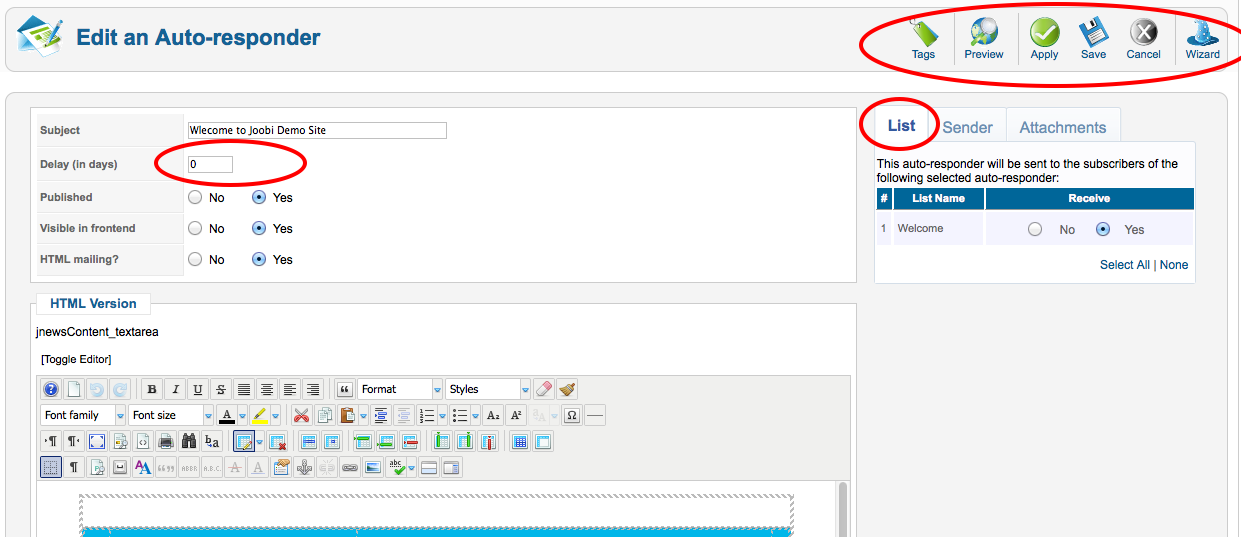
Step—5 Assign your Newsletter to a List.
You can assign a newsletter to several List without having to worry sending duplicates of emails to your subscribers.
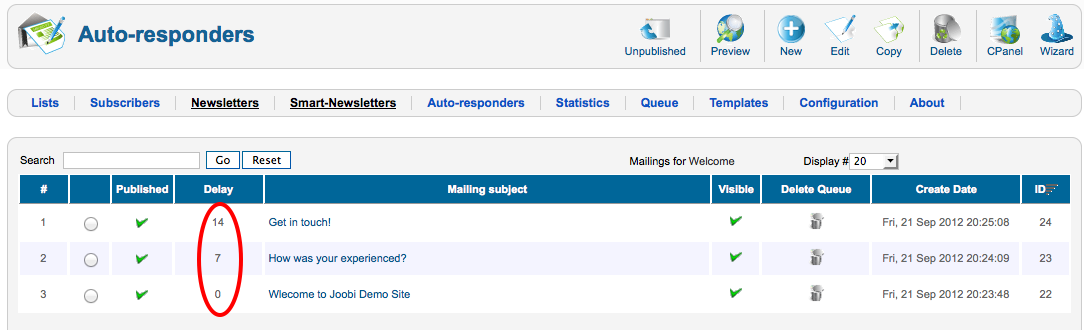
Step—6 Set up Delay
Use the Delay to choose when your auto-responder will send base on the number of days from the date of subscription.
For example, you can send a welcome email after a user subscribes to your List by setting the delay to 0. If you set your delay to 5 your auto-responder email will send 5 days after the user subscribed to your list.
Step—7 Test your Newsletter
Before sending your newsletter to your subscribers it is advisable to send a test copy to your test email using different email clients to make sure everything is working properly. Use the 'Preview' button to test your newsletter.
Step—7 Finalize your newsletter
In the auto-responder newsletter edit page, make sure to "Publish" the newsletter and verify the number of delay is properly setup.
Click [Save] to save the changes.
Queue Tab after user subscription
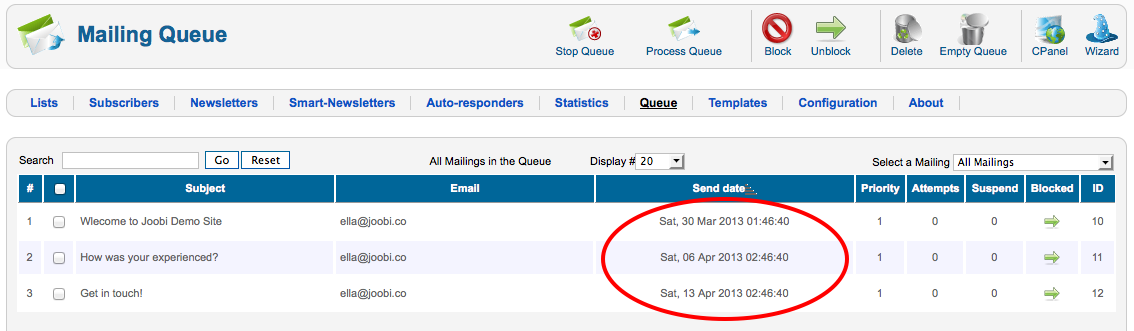
Priority: List Type and Subscription
Base on the above scenario about List Attachment in the Step 1.
Welcome List (Auto-responder) is attached to Free Newsletter List. Users who will subscribe to Free Newsletter List (via the module or via front end) will also be subscribed to Welcome List and will be receiving the series of auto-responders of Welcome List.
Likewise, if the admin subscribed a user (at the back end) to Free Newsletter List, that user will also be subscribed to Welcome List and will be receiving the series of auto-responders of Welcome List.
Moreover, users can change their subscriptions when they click 'Change Subscription' in the newsletter; the registered users might also clicked the button 'Change Subscription' once they logged in at the front end of your site.
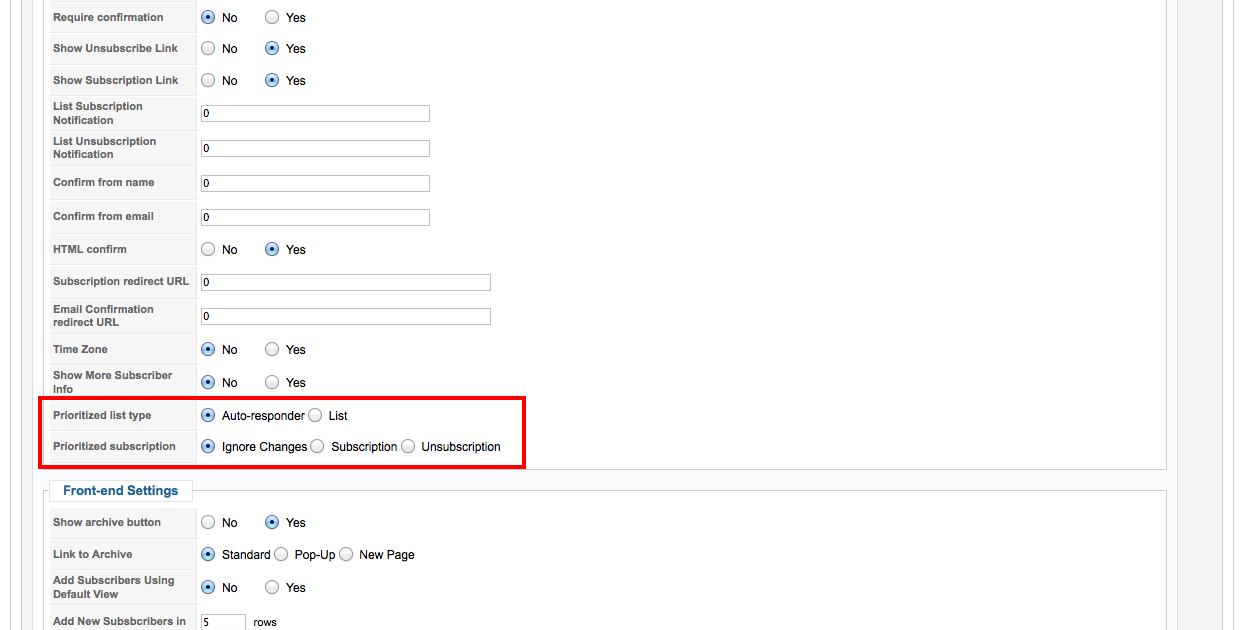
In the configuration, we added new preferences:
Components >> jNews >> Configuration >> Subscribers Tab
Example;
Welcome List (Auto-responder 1) and Course List (Auto-responder 2) are attached to Free Newsletter List.
If the Prioritized list type is List:
When the users subscribes to Free Newsletter List and unsubscribes from Welcome List:
- The user will be subscribed to Free Newsletter List, and Welcome List.
- The user will be subscribed to Course List as well since Course List is attached to Free Newsletter List.
If the Prioritized list type is Auto-responder:
- When the users subscribes to c and unsubscribes from Welcome List.
- The user will be subscribed to Free Newsletter List and will be unsubscribed from Welcome List.
- The user will not be subscribed to Course List as well since the priority is the auto-responder.
Furthermore, if the user only changes his subscription to Free Newsletter List without touching or changing his subscriptions to Welcome List and Course List, he will still be subscribed to Free Newsletter List, Welcome List and Course List. Irregardless of the list type priority, the user will be subscribed to Free Newsletter List, Welcome List and Course List.
Also, if the change of subscription is only done for Welcome List and Course List. Irregardless of the list type priority, the user will be unsubscribed to Welcome List and Course List.
For the preference Prioritized subscription:
- If the change of subscription was done to both list (Free Newsletter List) and auto-responder (Welcome List or Course List), the final subscription will be determined by the prioritized subscription.
- If the prioritized subscription is “Ignore Changes,” we neglect the change of subscription and maintain the subscription of the user to the auto-responder.
- But if the prioritized subscription is “Subscription,” we subscribe the user to the attached auto-responder of the list where the user subscribes. If it is “Unsubscription”, the user will be unsubscribed to the auto-responder where the user unsubscribes.