Sidebar
Create your first Newsletter
You need to create a List first before you can create your Newsletter.
Step—1 Setup your first Newsletter
In the Admin panel, Components >> jNews >> Newsletters
Click on the button New to create a new Newsletter
The default template is automatically loaded—you can create your personal customize template or change the default one in the template section.
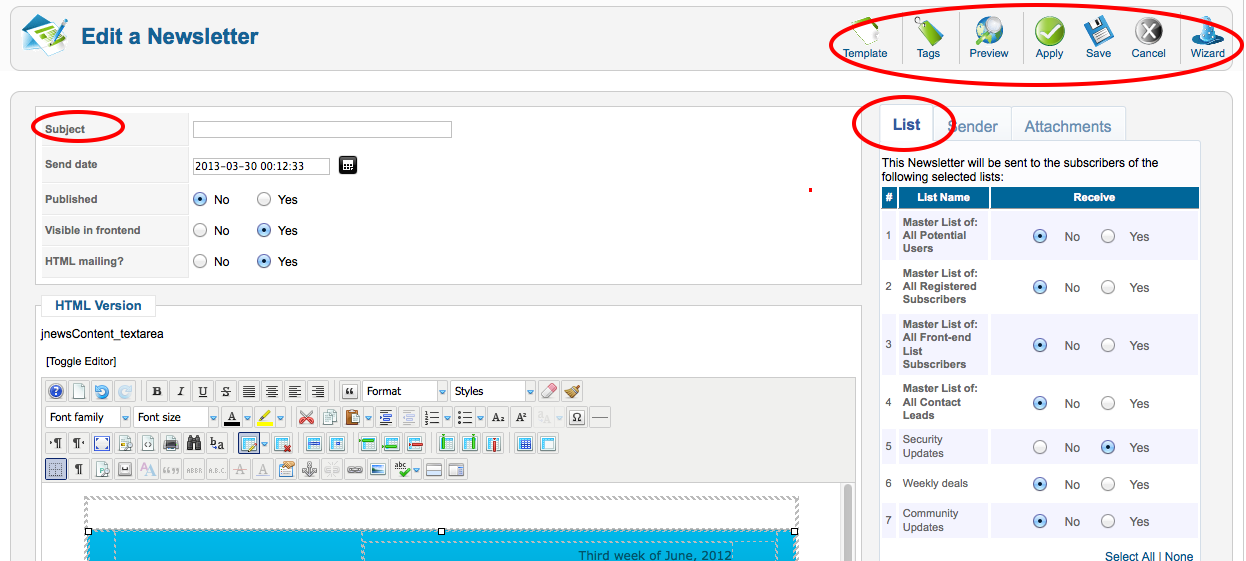
Ste-2 Select your template
Click on the Template button and select any other template available by default. It has 6 default templates you can use for free.
Write a subject and the content of your e-mail the way you want. You can insert pictures, text, links and so on..
Step—3 Add tags to your Newsletter
In the Newsletter edit page, click on the TAG button.
Tag is used to insert information like subscriber information, Joomla and K2 articles, modules, JomSocial data and social tags to promote your newsletter to a bigger audience like Facebook, Twitter and LinkedIn.
Step—4 Assign your Newsletter to a List.
You can assign a newsletter to several List without having to worry sending duplicates of emails to your subscribers.
Step—5 Test your Newsletter
Before sending your newsletter to your subscribers it is advisable to send a test copy to your test email using different email clients to make sure everything is working properly. Use the 'Preview' button to test your newsletter.
Step—6 Finalize your sending process
There are two ways to send your Newsletter.
1. Manual Sending
To use manual sending you need to properly setup your sending frequency to avoid server problems.
This process is available to free and paid versions of jNews.
In the admin panel, Components >> jNews >> Configuration >> Mail Tab >> Sending Settings
Pause x seconds every configured amount of emails >> Enter the number of seconds jNew will give the SMTP server the time to send out the messages before proceeding with the next configured amount of messages.
Emails between pauses >> The number of emails to send before pausing.
Click the article to learn more how to Setup using Manual Sending.
To understand this idea better, let’s follow with an example.
Johan is a blogger, he sends a weekly summary of all his articles to his 10,000 subscribers using jNews Core. He is using Siteground to host his website and only allowed to send 400 emails/hour and maximum 95 emails every 15 minutes.
To overcome server limitation Johan setup the following frequency;
Pause x seconds every configured amount of emails >> 900 seconds
Emails between pauses >> 90 emails
Avoid the following;
»Logout in your Joomla admin area
Make sure your website session lifetime is higher than the total number of hours to send all your newsletters. In the case of Johan he needs to send 10,000 emails, it requires him atleast 24 hours to have active login. To change your session lifetime setup, go to Joomla global configuration >> System Tab >> Session Settings >> Session Lifetime.
»Do not close the pop-up sending window
To send newsletter manually, it will open in a pop-up window to show you the process of the sending. Closing the window will stop the sending process. You can process the unsent emails anytime in the Queue and it will only send the remaining unsent emails.
»Loss of internet connection
It is good to have a stable internet connection to avoid sending interruptions. All unsent emails are automatically forwarded to the Queue and waiting for you to click 'Process Queue" to start again once internet connection kicks in.
2. Scheduled Sending
It is advisable to use Scheduled sending to avoid server limitation and does not require you to have internet connection once newsletter send time is set.
Click the article to learn more how to Setup Scheduled Newsletter.