Sidebar
Bounce-back Handling
The bounceback handling is available to all commercial versions of jNews.
In this article, we show you how to create a Smart-Newsletter in jNews.
How does the system works
jNews sends Newsletters... In these E-mail messages there are few parameters that you can configure.
- The "sender", which is visible when the client opens your Newsletter.
- The "reply-to", which is also visible when the client opens your Newsletter. And if the client clicks on the button "reply", the client will reply to the specified "reply-to" address.
- Those two parameters (sender and reply-to) can be modified for each Newsletter sent.
- There is a third parameter which is the "bounce back e-mail address". This parameter is not visible when the client opens your Newsletter and any automatic-reply will be sent to this e-mail address. The bounce back e-mail address will receive messages like "Could not deliver your e-mail", or "Failure Notice", "Delivery failure"...
- This bounce back e-mail address is the same for all messages sent by jNews and can be configured in the jNews Configuration page, under "Mail" tab.
Step—1 Install jBounceback
jBounceback is an Application that handles bounceback handling for jNews. This is a separate installation and completely different Application. Click this article for jBounceback install guide.
Step—2 Create an independent email adress to handle bounce messages
If you want the system to work properly, we do recommend to create an independant e-mail address to handle your bounce messages.
Create a new e-mail account on your mail hosting company (example : "This email address is being protected from spambots. You need JavaScript enabled to view it." don't forget to replace mydomain.com by your own domain name!)
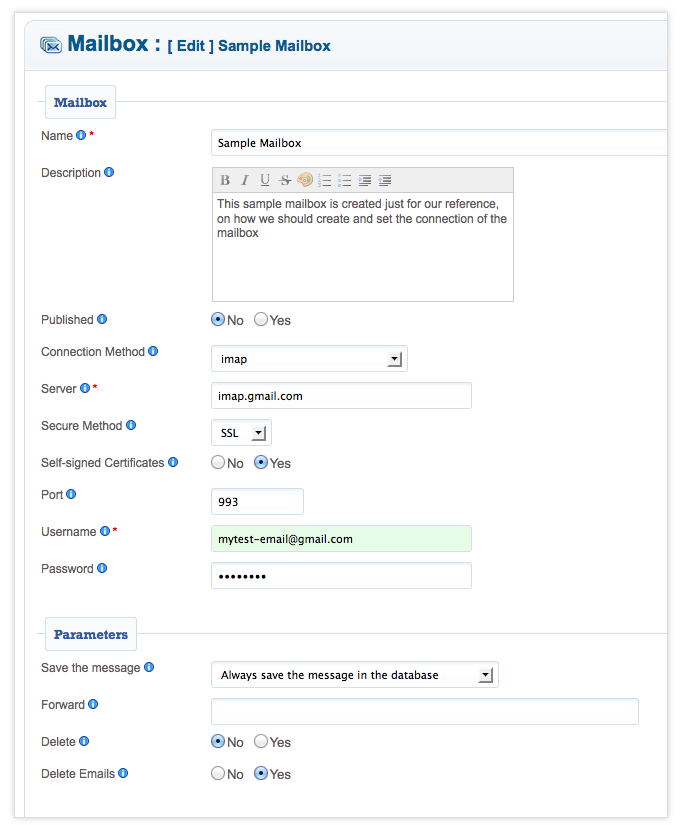
Step—3 Create a Mailbox
- In the admin panel, go to Components >> jBounceback
- Navigate to the Mailbox page.
- Click New button to create a mailbox.
- Your new mailbox should connect to your newly create email This email address is being protected from spambots. You need JavaScript enabled to view it. to be able to handle the messages properly
- Test the connection... and then click on the button "process" to handle the bounces.
Sample mailbox using a gmail account connection.
Step—4 Configure the jNews Widget
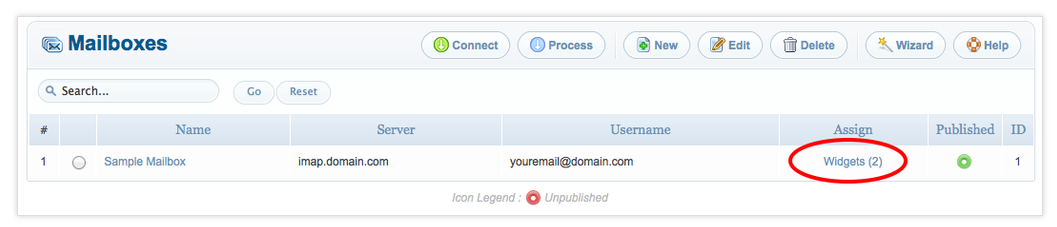
In the Mailbox page, click "Widgets (2)".
Important
1. Newsletter Bounce Widget and Dictionary Filter should be ON.
2. You need to set proper ordering. Dictionary filter should be set to 1 for the proper functioning of the bounce messages.
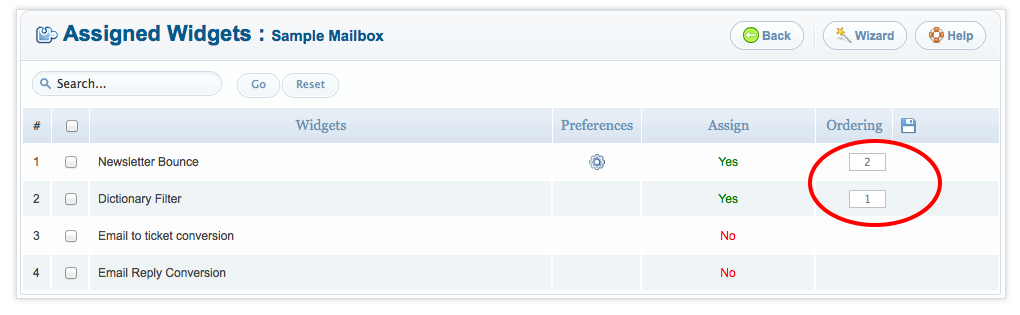
Newsletter Bounce: Enables you to handle the bounced back messages for jNews so that your list of subscribers keeps only real subscribers.

Dictionary Filter: Shows you the entries of words which can be found in the subject, body and in both parts of the email for filtering process. You can add entries for your own filters depending on what type of message they belong, jBounceback >> Mailboxes >> Dictionary.
Step—4 Setup task automation
To automatically run the bounceback without manually processing it, you need to use the cron to automatically process.
Configure the Cron Task
- In the Admin panel, select Components >> jCenter >> Preferences >> General >> Scheduler
- Define the cron to be use to launch the scheduler system.
No Cron: This means no cron running in your site so no automation will work.
Site Cron: This is the cron task plugin in your Plugin Manager. Some user mistakenly disable this plugin unaware of it's use. If you select this option, the plugin will be automatically enabled in the Manager.
Joobi Cron: If you selected this option make sure you create a cron in Joobi site. Login using your account and in My Cron please create a cron task and assign it as jScheduler.
External Cron: You can always use your server to run the cron for you. Make sure to use the correct script to trigger the link, please ask your hosting about it.
This is the link need to be triggered;
http://yoursite.com/index.php?option=com_jcenter&controller=scheduler&task=process&tmpl=component&password=
(enter the password if you have set one. Copy/paste this url on your browser to see if the scheduler application get launched properly)
- Click [Save] to save the changes.
Configure the Scheduler Task
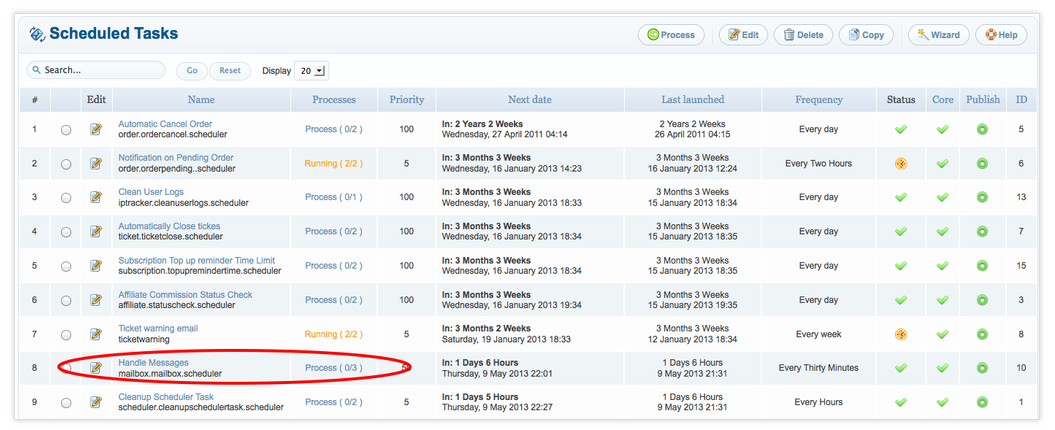
- In the Admin panel, select Components >> jCenter >> Tools >> Scheduled Task
- Locate the correct task for your scheduler, "Handle Messages & Empty Trash Box"
- Setup the correct frequency you want to use and click Save.
The Tasks are background task that applications need to work properly. The server execute those task in the background. This view enables you to monitor those tasks and modify or unpublish them.
If you select a task and then click on 'Process', you will force the scheduler to execute the selected task, even it's not time to do it or if the task is not published.
A Core task is a task required by one of the applications. A core task can not be deleted but you can be unpublished.
The Processes column tells you the number of processes currently running and the maximum number of processes set (Currently Running Processes / Maximum Process).
If the value is green, everything is good.
If the value is orange, maximum number of processes is reached.
If the value is red, the number of currently running process exceeds the maximum number of processes set. You might simply delete the running task. It will reset the scheduler.
Only user with at least Administrator access level can create, modify or delete a Task.
In the Scheduler page, check the checkbox of your task and click Process button to process the task. It will show successful message if there is no issue on the configuration and will activate the task.