Sidebar
Vendor Payment Setup
Use this procedure if each vendor handles individual payments. If you are taking a certain amount for every vendor sale, the vendor is responsible for paying the commission to the store admin.
Ofcourse the commission is calculated automatically after the buyer completed the purchase. The total commison can be view via jMarket >> Vendors >> Programs for store admins while vendors can view the total calculation in the frontend vendor area >> Commission under Sales menu. The vendor may need to transfer the due to the store admin via paypal, bank transfer or any modes of online transfer.
Skip this procedure if you are using Paypal Adaptive Payments and instead follow this article.
Before you begin, the following setup procedures must be complete:
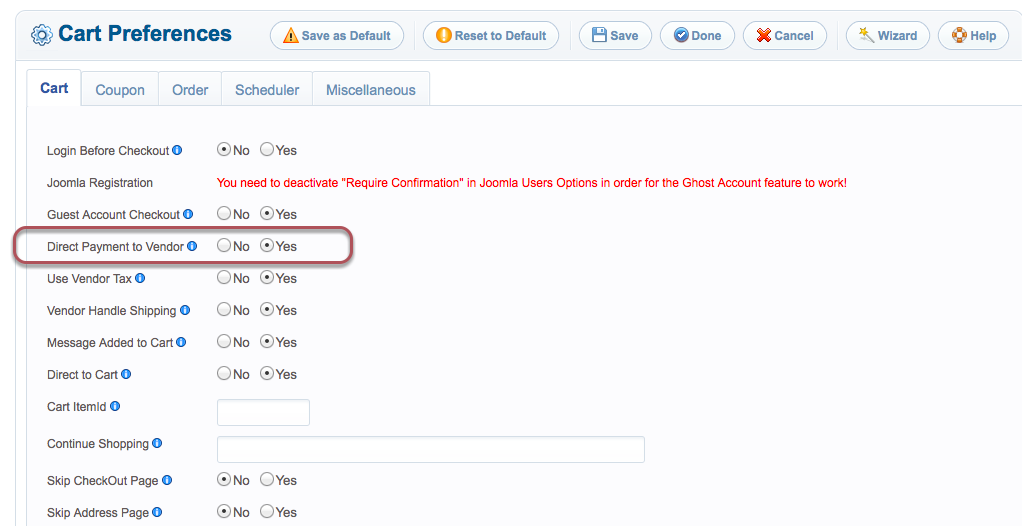
- In the admin panel, navigate to jMarket >> Orders >> Cart Preferences
- Select "Direct Payment to Vendor" >> Yes under Cart Tab.
- Click [Save] to save the changes.
Payment Gateway Setup
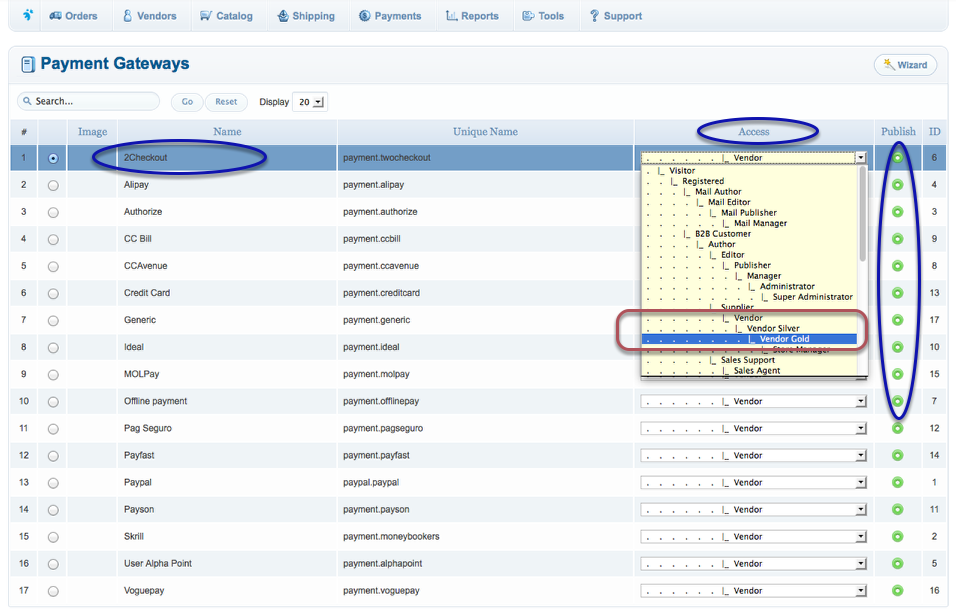
You can set proper payment gateway access if you want specific vendor to only access certain payment gateway.
For instance the Premium Vendors can use Paypal while lower vendor members can only use 2Checkout.
To create different vendor roles click this article to learn about role creation. The vendor roles can be assigned by offering a subscription, click this article to learn how to create subscription.
- In the admin panel, navigate to jMarket >> Payments >> Gateways
- When you are finished making changes, click [Save].
Vendor Payment Gateway Setup
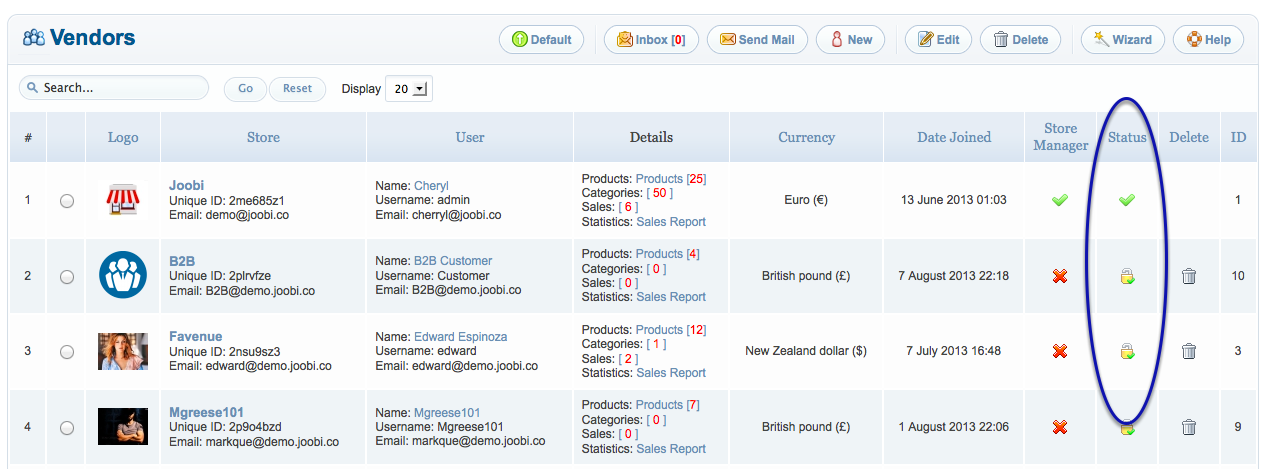
- Login in the frontend area of your Joomla site. You need to login using a verified Vendor account.
Take note: You can only have 1 store manager which is the first Super user of your Joomla website.
- Navigate to your Vendor Administration Area, the menu location will depend on your menu creation. If you have not created your store menu, please follow this article.
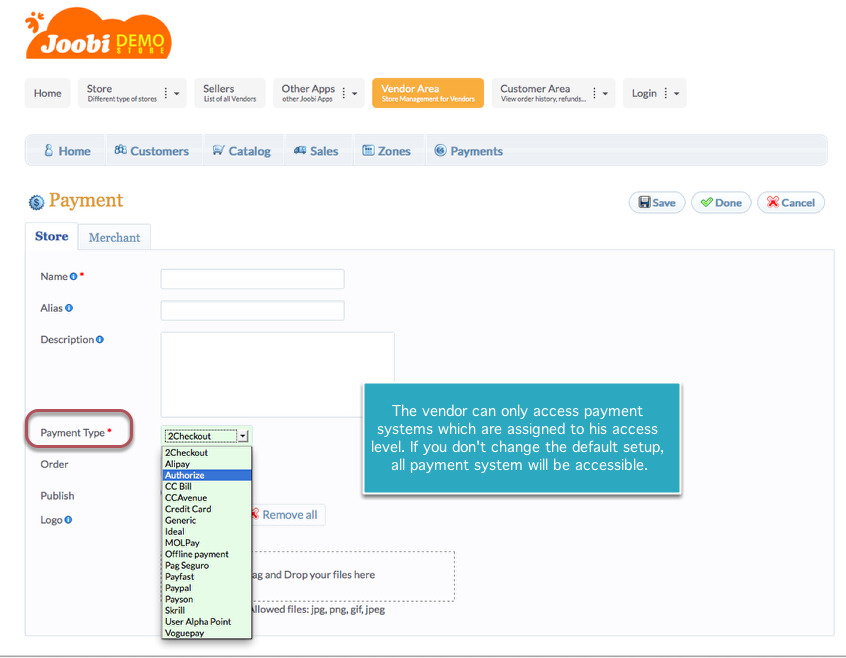
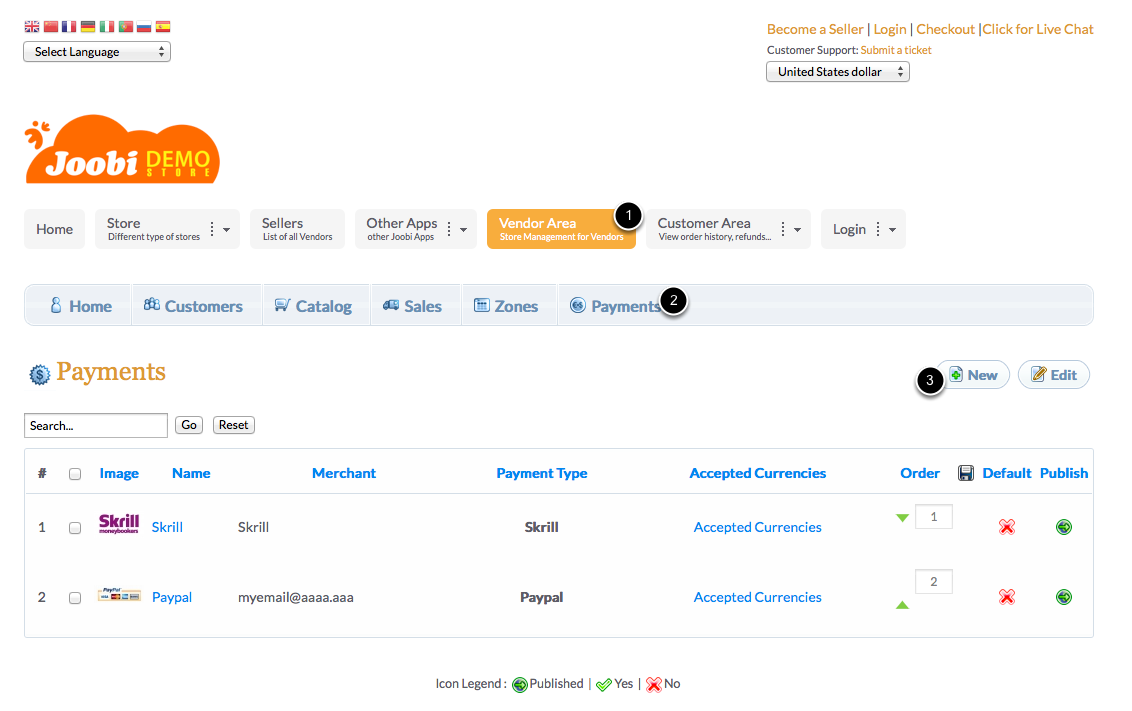
- In the vendor administration panel, navigate to Payments menu.
- Click New to create a new payment gateway.
- Fill in all the required fields, which are indicated by a red asterisk (*). Most of the options obtain a tooltip that will help you explain its usage.
- Click [Save] to save the changes.
If one of your desired payment system is not listed, high chance it is not supported yet. Please feel free to contact the support for the payment status availability.