Sidebar
Vendor Shipping Setup
If you sell tangible products from your store then you'll need to choose and configure at least one shipping method before customers can buy from you. Shipping methods allow you to define how a customer can receive the products they buy from your store.
Use this procedure if each vendor handles individual shipping methods.
Take note: The current version of jMarket as of August 2013 is not yet multi-cart. This means that if each vendor setup different shipping modules, you can only checkout products one vendor at a time. Please contact the support for Multi-cart status availability.
Before you begin, the following setup procedures must be complete:
- In the admin panel, navigate to jMarket >> Orders >> Cart Preferences
- Select "Vendor Handle Shipping" >> Yes under Cart Tab.
- Click [Save] to save the changes.

Step — 1 Vendor Address
Provide your correct address where the products are coming from this can be your store or somewhere else.
- In the frontend vendor area, Home menu >> Edit profile
- Fill in your complete address and when you are finished making changes, click [Save].

Step — 2 Create Zones
By default, we provide you with a global zone called [Storename] Default Zone All Countries. It is important to create Zones for the locations for which you will ship.
If you use the default zone, you will be shipping internationally, as this zone is intended apply to any locations for which you haven't created shipping zones. If you do not wish to ship internationally, then it is recommended that you delete the default zone created.
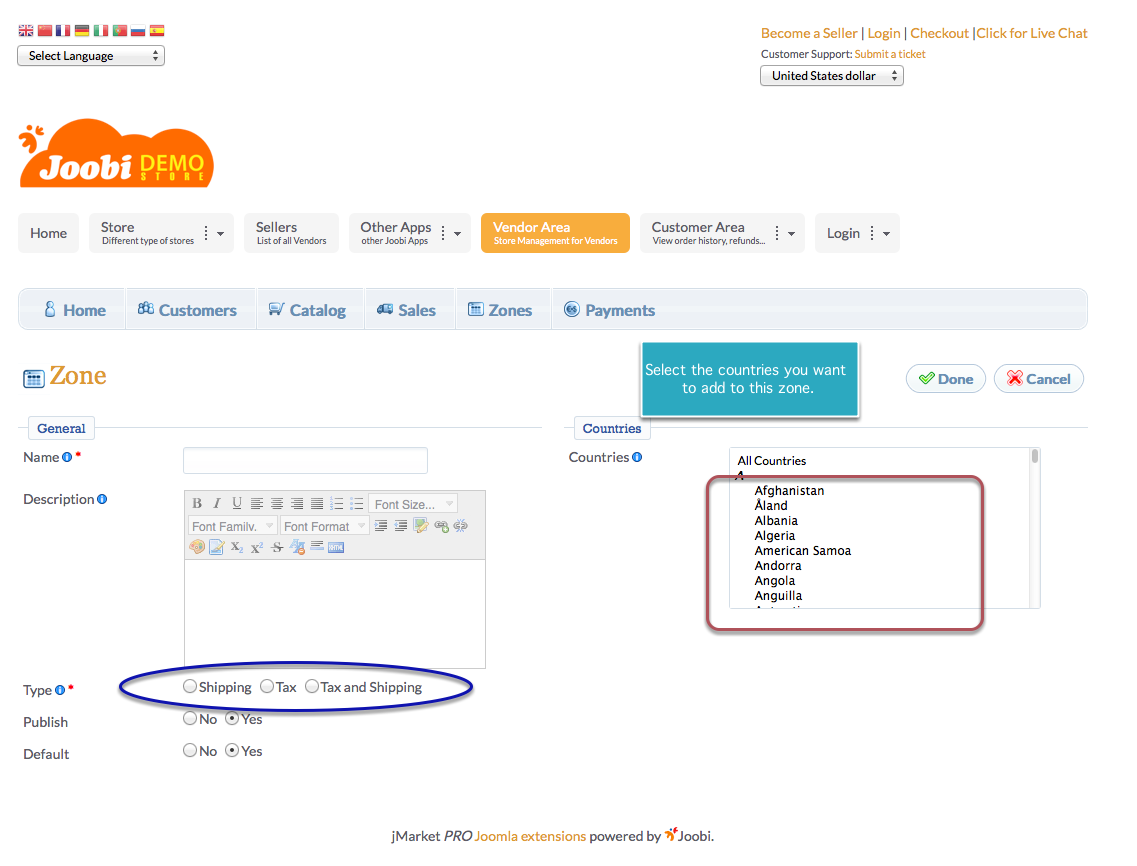
- In the frontend vendor area, select Zones menu to go to the Zone creation page.
- Click New to create a new zone and give the shipping zone a name, you can create zone based on one or more countries, and then select the country or countries you wish to ship to.
- When you are finished making changes, click [Save].
Shipping to One or Multiple States or provinces
When creating a shipping zone based on one or more states, we need to follow these steps;
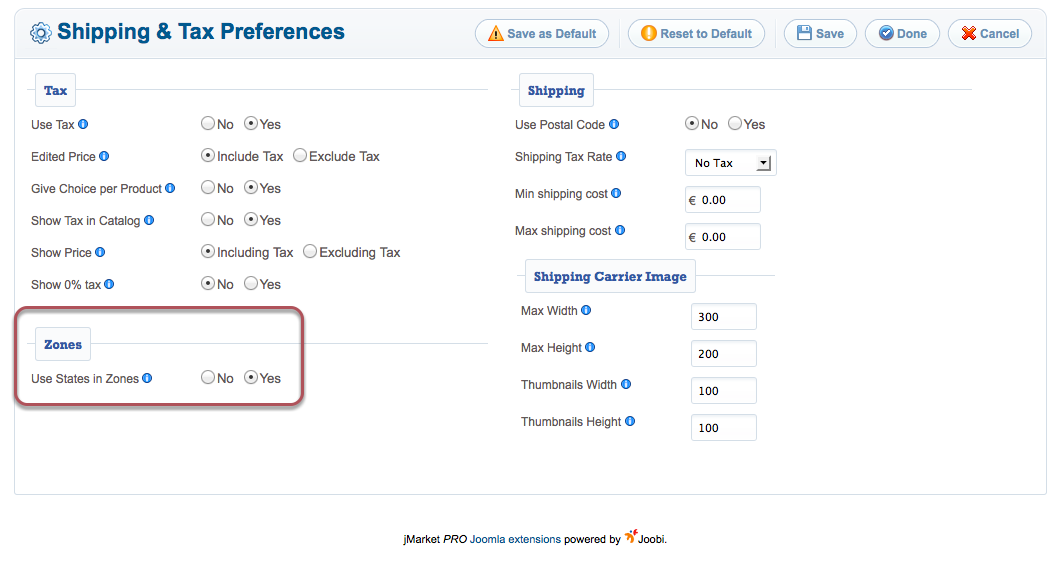
- Store admin need to enable the option "Use States in Zones" in jMarket >> Shipping >> Shipping & Tax Preferences.
- Select "Use States in Zones" >> Yes and click [Save] to save the changes.
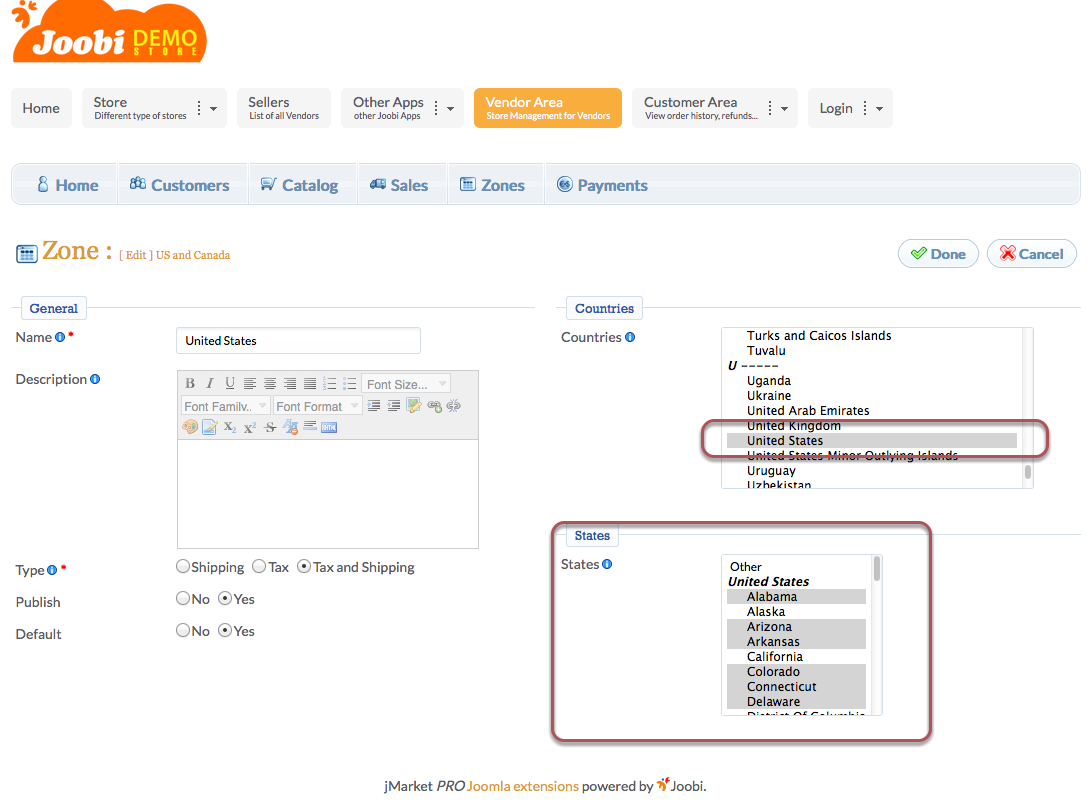
- In the frontend vendor area, navigate to Zones menu >> click New
- Give the shipping zone a name, give the shipping zone a name, select the country where the desired states reside, and then select the states or provinces you wish to ship to.
- When you are finished making changes, click [Save].
Step — 2 Create Shipping methods
Once you have created a shipping zone, you need to add shipping methods. Click Shipping under Sales menu in the frontend vendor area.
Here you need to choose a method type, then give the method a name which will display on the storefront checkout process. For each of the methods available, there will be instructions on how to set it up correctly.
Click the following shipping methods for individual setup instructions;
UPS
USPS
FedEx
Australia Post
Canada Post
In this case, we're adding a General shipping method for instance your local post office. Fill out any required information and click [Save]. This is only applicable if you know the exact price per weight for different destinations or you can use a flat rate.
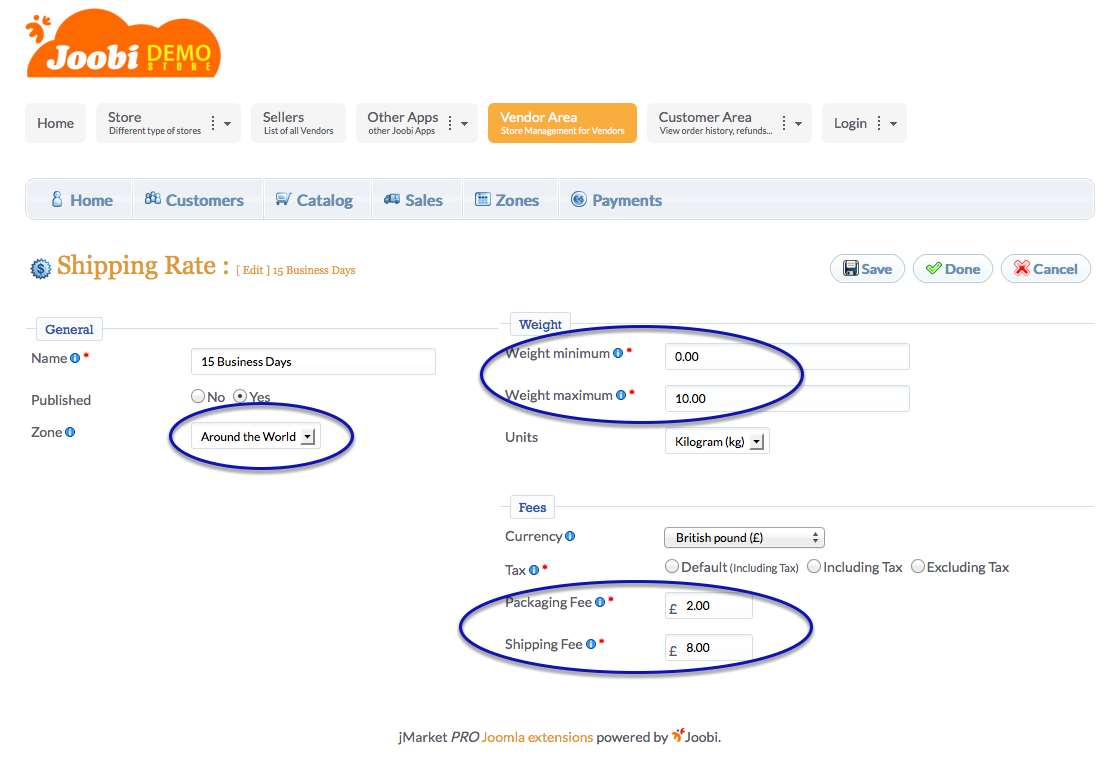
Take note: You need to specify the weight of your products every-time you create a new one, otherwise it will considered free shipping or a digital product.

You can repeat this process for as many shipping zones as you require, breaking the zones into as many countries, states or provinces that you need in order to build your store out to handle your shipping needs, or use different shippping methods.